
Learn how to create an Andy Warhol pop art photo effect in Adobe Photoshop using filters and color gradients.
The Andy Warhol effect is a part of the Pop Art Warhol Effect Photoshop Action from my portfolio on Envato Market.

Follow along with us over on our Envato Tuts+ YouTube channel:
Tutorial Assets
For this tutorial, you only need a stock photo to create the Warhol effect.
1. Add the Stock Image
Create a new document in Photoshop. Add the image that you want to turn into a pop art effect.

2. Use the Pen Tool to Draw a Contour Shape
Step 1
Use the Pen Tool to trace the contour of the woman. Make sure you have the Paths option selected.

Step 2
Add anchor points around the area that you want to cut. For this effect, the cutout doesn't have to be perfect.
Click on the screen to add a point. While the mouse button is pressed down, drag to create a curved path.

3. Make a Selection From a Path in Photoshop
Pick the Path Selection Tool and right click on the selection. Choose Make Selection from the menu.


4. Remove the Background in Photoshop
Press Control-J to make a copy of the selection in a new layer. Call this layer Woman Image. You can now remove the original layer.

5. Use the Threshold Adjustment Layer
Step 1
Press Control-J to duplicate the Woman Image layer.

Step 2
Hide the Woman Image Copy layer for the moment.
Add a Brightness/Contrast adjustment layer for the Woman Image. Right click on the adjustment and choose Create Clipping Mask.

Step 3
Add a Threshold adjustment layer for the Woman Image. Right click on the adjustment and choose Create Clipping Mask.

Step 4
Add a Stroke layer style for the Woman Image. Use the color #000000 for the border.

6. Use the Photocopy Filter
Step 1
Make the Woman Image Copy layer visible again.
Set the Foreground color to #000000 and the Background color to #ffffff.
Go to Filter > Sketch and apply the Photocopy filter to the Woman Image Copy layer.

Step 2
Set the blend mode of the Woman Image Copy layer to Multiply.

Step 3
Add a Levels adjustment layer for the Woman Image Copy. Right click on the adjustment and choose Create Clipping Mask.

7. Create the Warhol Effect
Step 1
Select all the layers. Right click on the layers and choose Convert to Smart Object. Change the name of the smart object to Warhol Effect.

Step 2
Add a Gradient Map adjustment layer for the Warhol Effect layer. Right click on the adjustment and choose Create Clipping Mask.
The colors for the Gradient Map are #1a72ea and #ffc119, but you can choose any colors you like.

8. Add a Background Layer
Add a new layer and move it below the Warhol Effect layer. Fill the layer with the color #000000. Add a Color Overlay layer style with the color #f048e6.

9. Create a Pop Art Poster
Step 1
Press Shift-Control-Alt-E to make a copy of all the visible layers merged. Name this layer Pop Art Poster.

Step 2
Press Control-T to resize the image to 50%. Change the Reference Point Location as shown in the preview.

Step 3
Press Control-J to duplicate the Pop Art Poster layer three times.
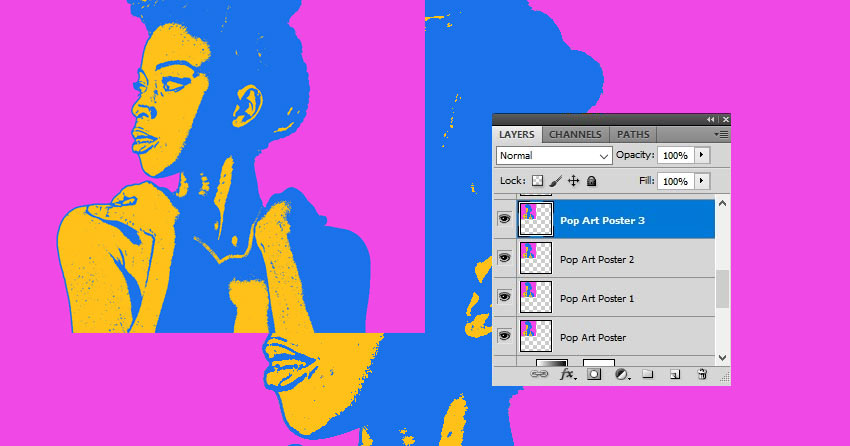
Step 4
Move the layers as shown in the preview image to create a poster.

Step 5
To change the color of the image, add a Hue/Saturation adjustment for each copy layer. Set the color tones that you like.
Right click on the adjustment and choose Create Clipping Mask; that way, the color change affects only the layer below.

Congratulations, You're Done!
In this tutorial, you learned how to create a Warhol Pop Art poster in Photoshop from scratch using only filters and adjustment layers.

For quick and easy results, you can check out the Pop Art Warhol Effect Photoshop Action, which will help you create Warhol posters with different sizes and effects.

No comments:
Post a Comment