
In this book cover template Photoshop tutorial, we'll create an 80s book cover design. You can use this book cover design template to explore a whole host of book cover ideas—whether you love a retro vibe or another aesthetic is your jam. Let's dig right in.

What You'll Need
You'll need the following resources in order to complete this project:
- Retro Landscape Kit (illustrative elements for 80s book cover design)
- 80's Retro Photoshop Text Effects
- The Painter Script Font
- Jurka Block Font
- Beauty Salon Modern Font Duo
- George Sans Geometric Typeface
Keep in mind that you can also follow these steps with your own assets and your own aesthetic. Feel free to use any fonts or imagery of your choice.
1. How to Create Your Own Book Cover Template
Step 1
First, let's talk about how book covers work. Your book cover template is going to vary depending on several factors, such as:
- The size of your printed book. Make sure to note these dimensions, as you'll need to base a lot of your decisions on this.
- The size of your book's spine. Think about this. A longer book is "thicker" than a shorter book—and we often need to accommodate this when designing for the cover.
- The type of binding. Are you designing a book jacket for a hardbound book? Or is your book perfect bound, with a soft cover? Different options may have different requirements.
This information can feel very overwhelming for a beginner. Luckily, your printer or printing service should be able to help you with these specifics. Many printers will even offer templates with guides to help you as you begin your design.

Step 2
Still, it's vital that you understand some of the basic terms used when printing a book cover. Here are some terms to note, so you can effectively ask questions and work with your chosen printer:
Trim Size. The trim size of your book (and its cover) is the final dimensions after the excess has been trimmed. So, for example, a 6"x9" print would have a 6"x9" print size.
Bleed. The bleed extends beyond the trim size. So, for example, your 6"x9" print might require a 0.125" bleed around all edges. Think of it like extra space to ensure a print that goes "full bleed"—or images that extend the full height and width of the printed area.

Step 3
Safe Area. This is typically smaller than your trim size. Typically, documents have a Margin, which we can use to leave space around the perimeter of our work. The safe area is the part of the page where it's safe to put essentials (like text) without risk of trim or visibility issues.

Step 4
Spine Size. The size of your book's spine will vary based on the length of the book and your printing options. A larger book will have a larger spine. Ask your printer or refer to a book spine calculator for reference.

Step 5
Let's take what we've learned and use it to calculate an example.
Let's say you plan to self-publish your book, and you'd like to work with US trade size—6" x 9" inches (15.24 x 22.86 cm). We'll create a perfect-bound, soft-cover book.
Let's work with a 0.125" bleed around all sides. Remember, this extends beyond our trim size, or the final size of the book.
And let's make our spine 0.5" wide. This is a general estimation for a book with 220 pages, using a rather thin paper weight (look for an online spine calculator or ask your printer for suggestions for this). So we'll need to add this 0.5" inches to our overall width.
Keep in mind that your cover has both a front and back side. That means we need to add:
Sample Width Calculation: 6" wide (for the front) + 0.5" wide (for the spine) + 6" wide (for the back) + 0.25" for the total bleed area on both outer sides.
Sample Height Calculation: 9" high + 0.25" for the bleed area on the top and bottom.
This would make our book cover template 9.25" high by 12.75" wide. These are the dimensions we need to use when we create our design document.
Again, keep in mind that this is an example scenario. Your book could vary based on dimensions, page length, paper choices, and other factors.

2. How to Make a Book Cover Template in Photoshop
Step 1
Now, let's turn to Adobe Photoshop. Create a New Document by going to File > New.
This will bring up the dialog box shown below.
Let's use the example we just explored. Set the document's Width to 12.75 inches and the Height to 9.25 inches. Set our Resolution to 300 dpi.
Click Create when you have input all of your desired values.

Step 2
Our new document looks like a large blank page. Let's start by creating some Guides so we know where the bleed, trim, and safe areas are in our composition.
Go to View > New Guide Layout.
Using the Margin options, input 0.125" around each side. These markers will show us the bleed area and where the book cover will be trimmed. Toggle Preview On to see your guides as you experiment with the values.
Once you're happy with your guides, click OK to add them.

Step 3
Now, let's another guide. This time, go to View > New Guide.
Click on the Vertical radio button, and then input 6.125 inches. This means 6" wide for our cover's width, plus 0.125" for our bleed on the left side.
Click OK once you've input these values.

Step 4
Let's repeat that process. Go to View > New Guide again.
Once again, we want to select Vertical. This time, input 6.625 inches.
Click OK once you've input these values. Now, we can clearly see where the spine is in our composition.

Step 5
Finally, let's add some margin space to our book cover. Consider this as defining our safe space, where we can put essentials like text.
Go to View > New Guide Layout.
Use the Margin settings, once again. This time, let's add 0.35 inches around each side.

Step 6
Not done quite yet! Let's add two more guides by going to View > New Guide.
Add one Vertical guide at 5.775 inches. This is the measurement to the spine, minus 0.35 inches for the margin space.
Add a second Vertical Guide at 6.975 inches. This is the width including the spine, plus 0.5 inches for margin space.
Here's what our composition looks like with all of our visual guides.

Step 7
This is a lot of information, so some book cover template designs will use visual cues to help make these guides clearer. This can also be a great way to check your work. Note that Step 7, 8, and 9 are not mandatory, but are recommended.
Open up your Layers panel, by going to Window > Layers.
Create a New Layer and call it "Bleeds".

Step 8
Next, let's toggle Snapping On. Make sure Snap to Guides is also On.

Step 9
Now, we can easily use the Rectangular Marquee Tool to select our bleed area—because it will snap to our guides.
With this area selected, use the Paint Bucket Tool to fill it with a color of your choice.
We can repeat this process to define any part of our layout we like. In the example below, the light blue color visually represents the bleed. The light gray is the margin space, and the dark gray is the spine.
Note: these colors will not be printed. They are for visual reference only.
Tip: I like to set the blending mode on these layers to Multiply, so I can continually see them while I design.

3. How to Make a Book Cover Design in Photoshop
Step 1
Now that we've made it through all that setup, we can freely use our template to experiment with any visual style we'd like.
In this tutorial, we'll focus specifically on an 80s book cover. So we need to think about what defines that aesthetic. We could use things like:
- saturated, bright, neon colors
- geometric shapes
- eccentric patterns, often with "busy" use of color and shape
- chrome and neon glow effects
- visual contrast and noise
- contrasting type (like block with script)
This might sound rather wild, but that's because the aesthetic of the 80s could stray on the wild side. When in doubt, take some time to do some visual research. This applies regardless of your chosen aesthetic. If you observe, you can identify what works and why.
Let's start with this example from Envato Elements. It contains a whole host of 80s-themed assets that we can experiment with. We can either use premade scenes or mix and match a whole collection of 80s-themed elements.

Step 2
To begin, copy and paste one of the images into your book design template. I chose one of the premade scenes from that particular resource kit.
You'll notice that Photoshop pasted it onto a new layer, in my Layers panel. For organization's sake, I named this layer "Image".

Step 3
Using the Move Tool, move and adjust the imagery until you are happy with its placement on the front and back covers.
I opted to duplicate the image (by duplicating the image layer). Then, I positioned them separately. I also decided to position them lower on the canvas.

Step 4
Since lowering the images left a large blank spot at the top, that needed adjustment. To fix this, I created a new layer beneath my images.
I selected this space with the Rectangular Marquee Tool. Then, I filled this with black, using the Paint Bucket Tool.

Step 5
Now, let's think about the title. This is often one of the strongest points of emphasis on a book cover design—so we want it to stand out.
For this demonstration, we'll use the Photoshop text effect shown below. It's got plenty of options to help capture that 80s aesthetic.

Step 6
Photoshop text effects can be a simple and fun way to experiment with advanced visuals. In this case, I used the font Jurka for the word "Retro" and the font The Painter for the word "Storytime".
You could use any font you prefer here—that's one of the cool parts of working with pre-made text effects. You simply double-click to go inside of the smart object, edit your text, and then check out your result.

Step 7
Then, I brought my newly created 80s text over to my book cover template.
You can drag layers between Photoshop documents to easily transfer content over—notice that my layers are still intact, from one document to another.
I like to organize my work into Folders in my Layers panel. Simply click on the folder icon at the bottom of your Layers panel to make a new folder.
Notice that I've placed the text into a folder called "Front Cover", below, and changed the color to purple. This is an optional step, but can be beneficial if you end up with a lot of layers to sort through.

Step 8
The rest of the text on the front cover doesn't need to stand out as much—but it still needs to match. Use the Type Tool to add more text to your cover.
I used the font George Sans Geometric for the tagline, at the top of the cover. It has a geometric look that matches the overall aesthetic.
I used the font Beauty Salon Modern for the author's name, at the bottom of the cover.

Step 9
Now, let's take a look at our back cover. Think about what kind of content you expect to see there. This is usually a place where we can "sell" our content to potential readers. I created a New Folder in my Layers panel for my back cover, too. Again, this is for organizational purposes.
Let's start off with an image—I used this stock image from Envato Elements. Copy and paste your image into your book cover template.

Step 10
Let's push the aesthetic here further. I tilted the image by going to Edit > Free Transform. Rotate the image slightly.
Then, create a neon pink square behind the image. To do so, create a New Layer. Then, draw a rectangle with the Rectangular Marquee Tool and fill it with the Paint Bucket Tool.
Alternatively, you could use the Rectangle Tool to draw this shape. Tilt your content until you're happy with its arrangement—use the Move Tool and/or Free Transform.

Step 11
To match our neon pink square, I created a larger, neon pink rectangle. This is a great space for some supplemental text.
Create this shape using one of the methods we covered in Step 10. Then, create some text using the Type Tool. I used the font George Sans Geometric.

Step 12
Continue to add text to your composition, using the Type Tool. I added some supplemental type next to our image. This is in the font George Sans Geometric, again, so it matches my other supplemental type.
I also added a headline on top of my neon pink rectangle. This is type that should stand out—so I used the font Beauty Salon Modern, again. This choice matches the author's name on the front.

Step 13
Let's continue that trend, but pulling more influence from the front cover.
I copied part of the title—the pink text that says "Storytime"—and reused it for a headline on the back cover. Simply edit this text using the Type Tool.
Using common elements like this can help visually unify your composition.

Step 14
There's a lot of geometric influence here. So let's try a geometric accent to bring even more emphasis to our top headline on the back cover.
Use the Polygonal Lasso Tool to draw a triangular selection. Then, fill this selection with white, using the Paint Bucket Tool.

Step 15
As you design, you may want to toggle your guides on and off, so you can preview your work without them. To do so, go to View > Extras. If it's checked, the guides will be visible.
You can also toggle off visibility on our margin colors in our layers. In the example below, the guides are hidden, and so is the visual margin space. We can still see a blue overlay for our bleed.
We can also go back to our "Spine" layer and change the color. In this case, I made the spine a solid black color. Use the Paint Bucket Tool to do so.

Step 16
Add text to the spine of your book cover design using the Type Tool. I used George Sans Geometric here, once again, so my font choice would match the rest of my composition.
Remember, you can experiment with each layer's Blending Mode. In this case, I took the black spine and set the blending mode to Multiply. Then, I lowered the Opacity, so it has a softer presence.

Step 17
In finalizing this design, I toggled visibility on for the "Margins: layer. This is not something that will print in the final product. However, it can help visually gauge the placement of content in relation to the trim. You can also rely on your guides to help you in this way. Make sure to keep key content, like text and your barcode, in this safe area.
Most book covers have a barcode. Make sure to check with your printer or publishing requirements for these specifications.
For example, if self-publishing on Amazon, make sure your barcode is 2" wide by 1.2" high. You can create a new document of this size and then copy and paste it into your book cover template. Then, you know your sizing is right on target.

Step 18
Here's a final preview of our work, with our guides, bleed, and margins/safety all hidden. We can toggle these visual helpers back on at any time, but it's nice to take a look at your work without them to get a feel for your progress.
4. How to Save and Preview Your Book Cover Design
Step 1
When saving your work, make sure to Save a Photoshop PSD file. Why? You'll want to preserve your layers, just in case you need to make adjustments. You might also want to use your book cover template again someday for another book.
Other file types, such as JPG and PNG, are often "flattened" images—meaning that you'll lose your layers.
Also keep in mind that a print-ready file is not necessarily appropriate for the web. If sharing your work online, I would recommend a low resolution, with a smaller preview. This will make loading the image faster and keep the print-ready version unavailable to the general public.
Go to File > Save As to save your work in other file types.

Step 2
Here in Photoshop, we've designed a flat book cover design. That's good and all, but wouldn't it be nice to actually see our book in action? We can do that with a Photoshop mockup.
We won't go through creating our own book mockup in this tutorial, but let's check out how using one can help us get a feel for our finished product.
Let's test out our work in this Photoshop mockup book cover template from Envato Elements.

Step 3
All we need to do is place our book cover design within the mockup's smart objects.
Double-click on the smart object in the Layers panel. This takes us "inside" of the smart object. All we need to do is Paste our book cover design into this space and Save.
Then, the mockup will visually update to display our content. Now, we get a taste of how our book will look when it's all printed and ready to go. Neat, right?

And Now You've Made a Book Cover Design
Creating a book cover template can include a lot of considerations, but it's not so tough, once you understand the basics. You can take these concepts and apply them to any book cover design. I hope you enjoyed creating this book cover template Photoshop design.
If you're looking for fonts, effects, images, and other content for your next book cover design, check out Envato Elements. You can find thousands of fonts, photos, graphics templates, mockups, and more—and they're all included with unlimited downloads.
Here's a sample of some of the content you can download today.
1. Photoshop Book Cover Design Template

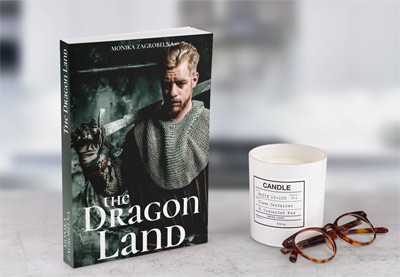
Looking for a ready-made book cover design template? Check this one out. It's all set up and ready to customize in Adobe Photoshop.
2. 80s Book Cover Design Template Photoshop

Here's another book cover template Photoshop design. It captures some of that stylish, 80s aesthetic, too. Use it to jump-start your design process.
3. Stylish Book Cover Design Template

There are plenty of templates in other sizes and shapes too. Check out this stylish square book template, for example. It could be a great fit for albums, photo books, and more.
4. Cook Book Cover Design Template

There are also plenty of book design templates for other software, like Adobe InDesign, on Envato Elements. Working on a cookbook or recipe book? Check this template out.
5. Book Cover Design Mockup Template

There are also plenty of mockups to check out on Envato Elements, like this one. They can be an awesome way to showcase your work.
6. Mockup Book Cover Template Photoshop

This mockup template is perfect if you're working on a book jacket. Check it out and test out your design in Adobe Photoshop.
7. Vintage Photo Creator (Book Cover Ideas)

Coming up with the perfect book cover can be tough. Consider trying out a Photoshop effect to give your imagery a creative twist. This one has a vintage flair.
8. Hipster Colorful Photo Template (Book Cover Ideas)

How about a colorful, decorative approach? This is another awesome template, where you can insert your imagery and end up with a whole new look and feel.
9. Watercolor Photo Creator (Book Cover Ideas)

Watercolor can make for a really dramatic and beautiful look—it could work well for a book cover design. Give this one a try in Adobe Photoshop.
10. Promotional Video Template for Book Cover Design

Looking to advertise your book? Envato Elements has video templates too, like this one, which is perfect for showing off your next big release.
Want to learn even more about book cover design? Check out this selection of free book-centric tutorials from Envato Tuts+. Happy designing!
 Product MockupHow to Make a Book Cover Mockup Without Photoshop
 Book CoverHow to Design a Vintage Book Cover
 Book DesignHow to Make a Book Layout Template in InDesign
 Book CoverHow to Design a Romance Book Cover
 InDesign TemplatesHow to Make an InDesign Book Template (Cover & Layout)

No comments:
Post a Comment