Google Slides is great for creating a professional presentation. Even if you know the basics of how to use Google Slides, you may not realize everything it can do.
There are killer techniques you can use to save time and make an even bigger impact with your Google Slides presentation—but you can't use them if you don't know them.

In this article, we share 20 pro Google Slides tips to help you get the most out of using Google Slides. Learn how to make Google Slides look good with these cool Google Slides tricks.
Guide to Making Great Presentations (Free eBook Download)
Before going further, be sure to grab our free eBook: The Complete Guide to Making Great Presentations. It'll help you master the entire presentation process, from initial idea, through to writing, design, and delivering with impact.

To learn more about the basics of Google Slides, check out our comprehensive Google Slides tutorial series.
How To Make Google Slides Look Good (With Envato Elements)
Before we dive into the top Google Slides tips, we want to show you a resource that's helped many creatives give their best presentation ever.
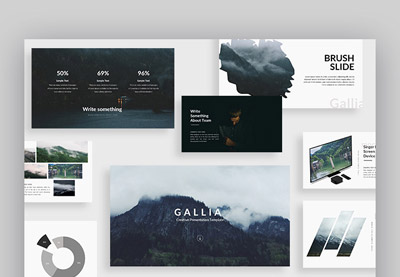
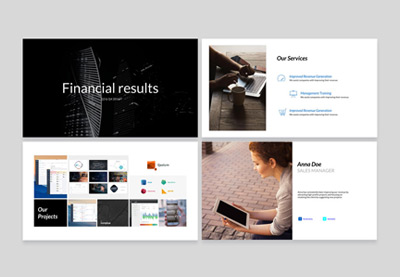
Envato Elements is an all-you-can-download service with the best Google Slides templates. These templates are full of pre-built designs that show you how to make your Google Slides look professional. Just open them and fill them out with your specifics.

Envato Elements includes many extras. Here are other assets, all included, that help you see how to make a good presentation on Google Slides:
- Stock photos. The perfect way to fill out a bare slide, there are over one million stock photos for a flat rate.
- Graphics and illustrations. Including infographics that help you explain concepts and ideas.
- Background music. To set the tone while your presentation plays.
Or, if you want to buy a single-use Google Slides template as a one-time purchase, explore the options at GraphicRiver.
If you want to learn how to make your Google Slides look professional, don't feel as if you've got to take it on yourself. Instead, trust others with start points for your presentation design. Think of each slide as being full of Google Slides tips for great designs.
Now let's dive into these powerful tips to using Google Slides like a pro:
Tip 1. Use a Pro Google Slides Template
A template is a great way to get a professional look for your Google Slides presentation without spending a lot of time on design or hiring a pricey designer.
Luckily, one of my favorite Google Slides tips is this: outsource the design work to someone else.
To use a presentation template or theme, first rename it. Then, simply find the professionally designed slides you like and type over them with your own information. You can quickly delete the template slides you don't need, use those you do, and add your own custom photos and info.

Learn how to change Google Slides themes in this tutorial:
.jpeg)
Hint: You can find professional Google Slides themes at Envato Elements or designs that show you how to make a good presentation on Google Slides on GraphicRiver. Or, browse through our best Google Slides themes in this feature article:
Tip 2. Cut & Paste a Slide From One Presentation to Another
If you give a lot of presentations, you may find yourself in a situation where you want to re-use a slide from one presentation in another. Don't recreate the slide—there's a better way.
You can copy a single slide from one presentation to another. Or you can copy a single slide from a theme or template. This can be a huge time-saver if you create a lot of presentations.
Here's what to do:
Open the Google Slides file with the slide you want. Click the desired slide and Ctrl + C to copy it to the clipboard.
In the example below, I'm copying a slide from a theme into an existing presentation:
.jpg)
Open the presentation you're creating. Click on the slide before where you want to insert the copied slide. Click Ctrl + V to paste the copied slide from the clipboard to the new presentation:
.jpg)
Notice the clipboard icon in the image above. Edit and modify the copied slide, as needed, from within your presentation.
Tip 3. Master the Master Slides Tool
Have you ever wanted to change an element in your Google Slides presentation that appears on multiple slides and been unable to make the change?
Chances are that you're trying to change something that's defined on a master slide or master layout. Master slides and layouts can be changed, but to do so you've got to open the Master Slides tool:
.jpg)
Changes that you make on the master slide are reflected on your entire Google Slides presentation. Changes you make on a master layout affect all other slides using that layout.
It's important to completely learn how to use Google Slides powerful Master Slides tool. For everything you need to know about the Master Slides tool, study this helpful Google Slides tutorial:
.jpg)
Tip 4. Dictate Your Presentation Text
For computers with a microphone, use your voice to dictate speaker notes in your presentation. Here's how:
Make sure your microphone is turned on. Click in the Speaker Notes section of your screen. Select Tools > Voice type speaker notes.
The Microphone icon appears on your screen:
.jpg)
Click the Microphone icon and begin speaking. Your text is added to the speaker notes as you talk:
.jpg)
When you've finished, click the microphone icon again to turn voice typing off. Click the X in the upper right corner of the icon to close it.
Hint: While you're speaking, you can add punctuation by stating the name of the punctuation you want to add. For example, saying "period" adds a period. Saying "comma" adds a comma. You can even say "new paragraph" and the text starts a new paragraph.
Tip 5. Use an Image as a Background
Images add a lot to a presentation. An image can illustrate a point, often better than words can. An image also adds interest to a slide and draws in your audience. An image can even be used symbolically to represent an important concept.
But you can do more with images than simply put them onto your slides. A background image can help make your presentation be more visually appealing. And it's easier to use an image as a background in Google Slides than you might think.
Here are complete instructions on how to use images in Google Slides, including step-by-step instructions for using an image as a background:
.jpg)
You can find an assortment of pro quality, royalty-free images on Envato Elements. in addition to ready-to-use photos, you also get access to templates, fonts and creative assets—all with unlimited downloads for a single monthly fee.
Tip 6. Put an Image in a Shape
We've already discussed the importance of using images in your Google Slides presentation to add interest. We've also explored how to use a photo as a background.
But background images are just one cool thing that you can do with photos in Google Slides. Another trick that many presenters don't know about is the ability to import an image into a shape.
To set your presentation apart with images embedded in shapes, learn how to do it in our Google Slides tutorial on working with images:
Tip 7. Answer Audience Questions With Q & A Tool
Google Slides has a neat feature that allows you to accept questions through the Internet while you're making your presentation. This tool can also be helpful for live webinars.
When you activate the Q&A feature during your Google Slides presentation by clicking on the Q&A icon, the audience sees the words Accepting questions with a weblink:
.jpg)
To ask a question, your audience goes to the weblink and types their question into the prompt:
.jpg)
Your audience can even ask their questions anonymously. There's also a feature that lets other presenters rate the questions that are being asked by giving a thumbs up or a thumbs down
If you're going to give the presentation again, review past questions as part of your preparation. Select the Tools > Q&A history menu option, a panel displays on the right showing past questions:
.jpg)
Tip 8. Add Sound to Your Presentation
Currently, the Insert drop-down menu in Google Slides doesn't have an audio option. But that doesn't mean you can't add audio to your presentation.
Basically, there are two ways to add sound to your presentation:
- Link to a streaming music service like Spotify, SoundCloud, or Apple Music.
- Insert a YouTube video that's got a soundtrack you want to use.
Caution: Make sure that you've got permission to use the soundtrack or music you choose.
The following Google Slides tutorial takes you through the process in detail:
.jpg)
Tip 9. To Collaborate, Share Your Presentation
Collaboration is a great way to make sure your Google Slides presentation is the best it can be. The give and take of ideas often results in a higher quality end product.
Like all Google Drive based tools, Google Slides allows you to share your presentation. Using the Share button to share your presentation with a specific person:
.jpg)
Or, create a shareable link to send out in email or use on your website:
.jpg)
Google Slides allows you to define the level of access others have and what they can do. You decide whether they can edit the presentation, comment only, or just view it.
.jpg)
Once your presentation is shared, those who have the right access to your presentation can use the Comments button to provide you with feedback and ideas.
Tip 10. Make Your Google Slides Look Good - Quickly
You've already seen it earlier in this tutorial, but I can't say it enough: to learn how to make your Google Slides look professional, use a template. When you use a template, you don't have to learn the app entirely on your own.

Starting with a template is like having a guide to creating a great presentation. Open it up and instantly, you see Google Slides tips in the form of pre-built slides. They're already perfectly laid out and ready for your content.
To learn more about how to customize your Google Slides presentation, check out these two tutorials below. They're loaded with advice on how to make Google Slides look good:
 Google SlidesHow to Create Google Slides Presentations Using Cool (Customizable) Themes
 Google SlidesHow to Make Google Slides Presentations Look Good (5 Cool Effects for 2020)
Tip 11. Add Technical Terms to the Personal Dictionary
Under the View menu option, choose Show spelling suggestions. When this option is selected, possible spelling errors show up underlined with red.
However, Google's spellcheck isn't perfect. Often company-specific terms, names, and abbreviations show up with the red underline.
To fix this, go to Tools > Personal dictionary. Add your specific terms. They'll no longer be flagged as possible spelling errors:
.jpg)
If you later decide to remove a term from your personal dictionary, open it up again. Click the X to the right of the term you want to delete and click Save.
Tip 12. Go Back to an Earlier Version of Your Presentation
Suppose you update your existing Google Slides sales presentation to include some new features of your product. Then, at the last minute, your company decides not to release those new features.
This could mean a major rewrite of your presentation, but with Google Slides it doesn't have to mean that.
Use the revision history under File > See revision history to see a panel listing older versions of the presentation. The Revision history panel appears to the right of your presentation:
.jpg)
Click on an older version to display it. A prompt appears at the top of the screen asking if you want to Restore This Version:
.jpg)
Another prompt asks you to confirm the restore. After the confirmation prompt, the older version becomes the current document.
Tip 13. Embed Your Presentation in a Website
Use the File > Publish to the web menu option to embed a slide presentation on your website.
Publishing a Google Slides presentation means that someone can see it without logging into their Google accounts. (As opposed to sharing a presentation, where a user must be logged into Google Drive to see your presentation. Also, note that those who view a published presentation cannot edit or make comments.)
Here's the Publish to the web dialog box:
.jpg)
As you can see from the image above, you can also define the following aspects of your published presentations:
- Google Slides slide size
- how often the slide auto-advances
- when the slideshow starts
- whether the slideshow loops
Tip 14. Play Your Presentation Using Chromecast
Chromecast allows you to share a presentation from an Android mobile device if you've got a Chromecast device available and set up. You also need to have a Google Home app on your mobile device, available WIFI, and be using the Google Chrome browser.
The Chromecast device plugs into the monitor you want to use. It even works with some Smart TVs.
When you open your Chromecast app, it looks for nearby Chromecast devices. Select the correct device, enter your password, and name your Chromecast. Select the Google Slides presentation you wish to stream to the TV or monitor. Then, click on the Chromecast button to stream your presentation.
For more information, here are Google's instructions for using Chromecast.
Tip 15. Learn Google Slides Keyboard Shortcuts
Did you know that Google Slides has keyboard shortcuts? If you use Google Slides often, learning and using keyboard shortcuts can save a lot of time.
Find the keyboard shortcuts at the Help > Keyboard shortcuts menu option. Here's a screenshot of some the available shortcuts for Google Slides:
.jpg)
The shortcuts are arranged by functionality. To see the shortcuts for a specific functionality, click on that functionality in the list on the left.
Rather than trying to memorize all the keyboard shortcuts at once (which could be somewhat intimidating), focus on learning the shortcuts for the tasks you use most often.
Tip 16. Make Your Text More Stylish
Like most presenters you probably realize that you can change font size and type, as described in this basic Google Slides tutorial:
.jpg)
You may even realize you can change the font color and add font attributes like boldface, italics, and underline. What you may not know is that there are other ways to make your text stand out. Here's a tip to add a drop shadow to your text using two text boxes.
Select the text you want to add drop shadow to by highlighting it. Click the A icon in the toolbar to open the color palette and change the color of the text. It's best to choose a dark color since this will be the shadow.
Select the text again and use CTRL+C to copy it to the clipboard. Draw a new text box on the slide. Use CTRL+V to copy your text into the text box.
Select the copied text by highlighting it. Click on the A icon in the toolbar to change the color of the text. A bright color works well.
Drag the second text over the first text box. Position it slightly to the side and beneath or above the first text box.
Here's an example of the drop text effect I made using red and black as font colors:
.jpg)
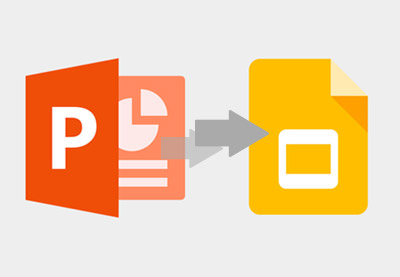
Tip 17. Import Your Existing PowerPoint Presentations
One of the most daunting elements of learning a new piece of software is the switching cost. You're already familiar with a tool like Microsoft PowerPoint so switching to Google Slides represents extra work.
Luckily, Google has done a great job bridging that by building in backward compatibility. You can upload your PowerPoint presentations and keep working inside your browser with most features and functionality supported.
Follow the tutorial below to see the Google Slides tips and tricks to convert your PowerPoint presentation.
Tip 18. Use Highly Specialized Templates
In an earlier tip, I recommended using Google Slides templates to build great presentations. There are hundreds of great Google Slides presentations that you can use for practically any type of presentation on Envato Elements, for example.

I like to divide Google Slides presentation designs into two categories: general purpose, and highly specialized.
Check out the three roundups below to see Google Slides designs that are for specific purposes:
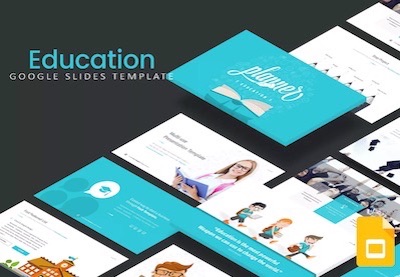 Presentations30 Google Slides Templates for Teachers, Educators, and Students for 2019
 Google SlidesHow to Make an Infographic With Google Slides Using a Template
 Google Slides25+ Nature & Floral Google Slides Themes (Free + Premium Presentation Designs)
Tip 19. Add a GIF for Fun Motion Images
GIF images have certainly grown in popularity in recent years, so why not consider adding one to your next Google Slides presentation?
The Google Slides tutorial below can help you add a GIF to your next presentation. Learn how to upload your own GIFs or source them to add motion imagery to your upcoming Google Slides presentation.

Tip 20. Print Your Finished Slides
Even if your slides will be delivered on-screen, it helps to have printed copies that you keep at the ready. I always print my slides before presenting to give me a copy to proofread. There's something about seeing your slides on paper that can help you catch errors you might have otherwise missed.
When printing your presentation, try to save as much paper and ink as possible. Use the Google Slides tutorial below to print your slides for maximum efficiency!

Tip 21. Set Up Slide Timing for Slick Delivery
Some of the best presentations I've attended use automatic transitions for a powerful delivery. When you've got extra time to prepare for your presentations, consider setting up slide timings.
The traditional model for presentations is to use a "clicker" or mouse to advance slides. But for expert presenters, automating slide timings can lead to smooth transitions and slide progressions. If you can nail the delivery, auto-advancing slides and effects using timings is an amazing effect.
Learn more about setting up slide timings in the Google Slides tutorial below:
.jpg)
Advantages of Using Google Slides vs PowerPoint
If you're already entrenched in using a popular presentation software like Keynote or PowerPoint, you might be wondering why it's worth learning yet another tool. Using Google Slides gives you additional features (or better versions of the same features) and that makes it worth your consideration.
Don't just take my word for it: Google Slides continues to gain traction. As the chart below shows, there's an aggregate growth in search volume for the online search tool.

When comparing Google Slides vs PowerPoint, some of my favorite features in Google Slides include:
- Collaboration. Sure, every presentation software has implemented some version of this functionality. But Google Slides just does it better, with real-time collaboration and easy chat built into the app.
- Low switching cost. Because you can import and export your presentations to PowerPoint format, there's no real "switching cost" of jumping between the apps. While other apps require long term commitments to formats, Slides gives you freedom to experiment.
- Always backed up. Fully embracing the cloud means that you don't have to worry about how you store your presentations. It also gives you version control to jump back and forth between revisions.
Check out the presentation app comparison below that includes a complete Google Slides vs PowerPoint review.
More Professional Google Slides Template Resources for 2020
One of my favorite Google Slides tricks is to hand off the heavy lifting of designing your presentation. You've already seen Envato Elements, an all-you-can-download service for sourcing Google Slides presentations.

One of my favorite things about these templates is that they already have Google Slides dimensions and sizes locked in. They typically contain widescreen and standard formats so that you'll spend less time guessing at the proper Google Slides sizes and more time on content.
Let's look at three examples of the best Google Slides presentation templates that you can source from Elements:
1. Vexana

Vexana is far from a neutral and flat Google Slides presentation. The bright and flashy colors are sure to grab the attention of your audience. Use this contrasty presentation to set the tone early when you're presenting.
2. Arara

My favorite Google Slides tip is that you should choose templates that you can use over and over. When you download a template like Arara, the flexibility of the template helps you to use it for multiple presentations. Just drop in your details and you'll bring your content to life!
3. Manola

A pitch deck is a presentation that's designed to launch your company or idea to success. Manola is the perfect presentation that includes all the Google Slides essentials for a pitch deck. Use this template to get the investor or potential employee support to get your company off the ground.
For even more outstanding templates that can help you master how to use Google Slides, check out the roundups below:
.jpg) Google Slides35+ Best Business Presentation Templates for Google Slides (For 2020)
Google Slides35+ Best Business Presentation Templates for Google Slides (For 2020) Presentations20 Google Slides Templates to Customize With Amazing Presentation Backgrounds
Also, learn more about using Google Slides in our ultimate tutorial series on How to Use Google Slides.
Learn All About How to Make Great Presentations (Free PDF eBook)
Take the knowledge you gained in this Google Slides tutorial further with our eBook: The Complete Guide to Making Great Presentations. Grab this PDF Download now for Free with your subscription to the Tuts+ Business Newsletter.
It'll help walk you through the complete presentation process. Learn how to write your presentation, design it like a pro, and prepare it to present powerfully.

5 Top Google Slides Presentation Design Trends for 2020
As you build your next Google Slides presentation, think about embracing some of the top trends for your slides in 2020. These are surefire ways to help you build better slide decks. That means it’s easier than ever to engage with your audience!
Let’s explore five of these top Google Slides tips today:
1. Highly Visual Slides
Wondering how to make Google Slides look good? Embrace a popular trend: highly visual slides. Whether it’s bright colors, photos, or even charts and graphs, visually engaging slides are built to capture audience focus.

It helps to think of slides as visual aids. You shouldn’t be simply reading text. Instead, use slides to illustrate the key points you’re talking about. Audiences will thank you. More importantly, they’ll remember and understand what you said later.
2. Short and Sweet Slide Decks
You can use all the cool Google Slide tricks in the book, but brevity is growing ever more important. Most of us lead busy lives, with many demands on our time. No one wants to sit through a lengthy, rambling presentation.
The best Google Slides presentations today are short and sweet. They focus on a few key points, driving home their message clearly and concisely. See more tips in our design guide:
3. Making Data Visual With Infographics
Infographics are illustrations designed to visualize data. That makes them ideal tools to use when creating professional presentations.

Infographics like this merge information and graphics to form compelling visuals. This helps audiences form a mental image of your big ideas. They look great on big screens, and are increasingly recognized as far superior to dull, text-heavy slides.
4. Use a Memorable Design When It Fits
Many times, your presentation design should fit in and not be too bright or loud. But when you've got room to experiment, don't be afraid to use a memorable design.
If the content is a bit flat, you can make up for it with an advanced template. Bright color schemes, graphics, and backgrounds are more likely to stick to your audience.
The article below has 20 of the best unique designs for when being forgotten simply isn't an option.

5. Bringing Apps and Websites to Life With Mockups
Sure, you can say you've got a website or app. But that’s no substitute for showing it off. That’s where device mockup templates come in. Device mockups are illustrations of real devices like notebooks, tablets, phones, watches, and more.

By combining a professional device mockup template and a screenshot image, you bring your online platform to life in a realistic way. Thanks to Google Slides and custom templates like this one from Envato Elements, it takes only seconds to create your own device mockups.
Learn More Techniques to Use Google Slides Effectively
Pros use cool Google Slides tricks to design their best presentations in less time. If you're still learning how to make a good presentation on Google Slides, we've got you covered with a special series.
Our resource How to Use Google Slides (Ultimate Tutorial Guide) is the single best source for Google Slides tips. Check out three tutorials, each loaded with tricks on how to make Google Slides look good:
-
Google SlidesHow to Make an Infographic With Google Slides Using a Template
 Google SlidesWhat Is Google Slides? Great (Free) Online Presentation Software
 Google Slides20 Fun Free Google Slides Themes (+Playful Slideshow Design Ideas for 2020)
Go Build a Google Slides Presentation Today
You can accomplish more with Google Slides than you may have realized. Once you master these professional Google Slides tips, you'll be amazed at what you can do.
Learning how to use Google Slides like a pro comes down to borrowing from talented graphic designers. As you saw in this round-up, Google Slides tips and tricks combined with templates from Envato Elements and Google Slides templates from GraphicRiver are the best way to build great Google Slides presentations.
What techniques do you use to bring your presentation to the next level? Share your professional Google Slides tips in the comments below.
This tutorial was originally published in September 2017. It's been updated to include new information—with special assistance from Andrew Childress.

No comments:
Post a Comment