
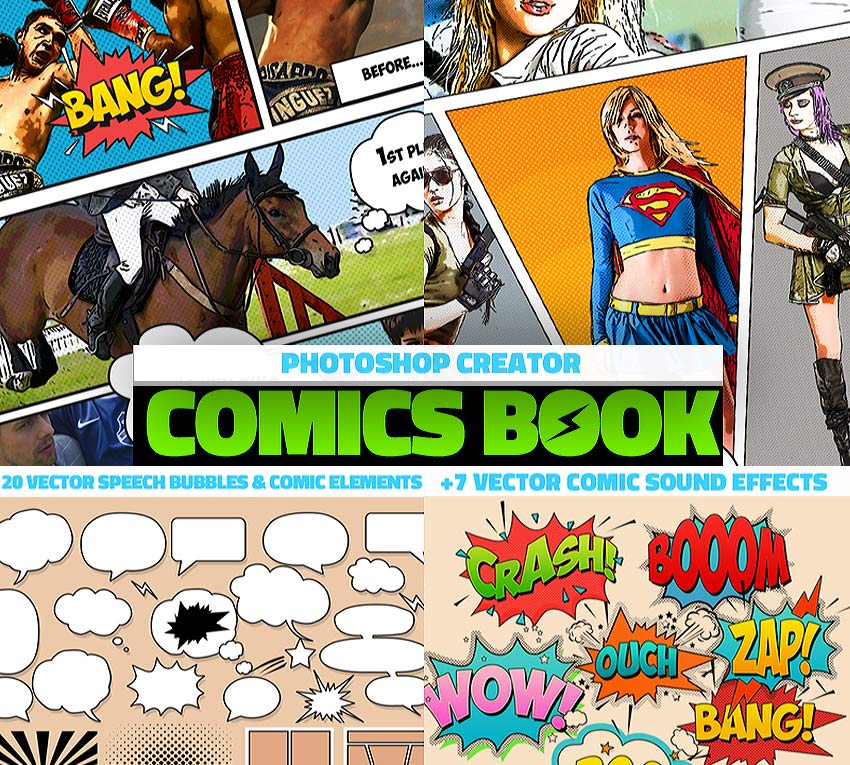
In this tutorial, I will show you how to turn a photo into comic book art in Photoshop using filters and textures.
This comic book photo effect is a part of the Comics Book Photoshop Creator from my portfolio on Envato Market. The pack includes the comics book action, 20 vector speech bubbles, and 7 vector comic sound effects that you can edit.
Follow along with us over on our Envato Tuts+ YouTube channel:
Tutorial Assets
For this tutorial, you have to download these assets:
1. How to Create the Sunburst Background
Step 1
Create a new 850 by 645 pixels document in Photoshop. You can, of course, choose any size you want, but you will have to adjust the settings proportionally.
Make a new layer called Sunburst Background. Pick the Gradient Tool (G) and choose the gradient colors: #777777 and #c5c5c5.

Step 2
Keep the Shift key pressed and draw a vertical line starting from the top of the canvas, with Linear gradient shades from the starting point to the ending point in a straight line.

Step 3
Go to Filter > Distort > Wave and make these settings to create vertical lines.

Step 4
Make sure you have the first line light gray and the last line dark gray. If this is not the case, press Control-T to fix that.

Step 5
It's very important to go to Image > Trim and make these settings, otherwise the previous step will not count.

Step 6
Go to Filter > Distort > Polar Coordinates to create the sunburst.

Step 7
Go to Layer > New Adjustment Layer > Gradient Map to add color to the sunburst background. You can choose any colors you want. I will use #003876 (location 23%) and #00b5e9 (location 100%).

2. Remove the Background in Photoshop
Step 1
On a new layer, add the Couple Photo and use the Lasso Tool to make a rough selection of the couple.

Step 2
Press Shift-Control-I to invert the selection. Press Delete to remove the background.

3. How to Increase the Contrast of a Photo in Photoshop
Step 1
Add a Brightness/Contrast adjustment layer to increase the contrast of this photo.
Click on the third button from the left to add this adjustment as a Clipping Mask for the layer below.

Step 2
Add a second Brightness/Contrast adjustment layer to increase the contrast of some parts of the photo.
Click on the third button from the left to add this adjustment as a Clipping Mask for the layer below.

Step 3
Click on the Layer Mask of the Brightness/Contrast adjustment layer and press Control-I to invert the white color.
Pick the Brush Tool and, with a soft round brush, paint over some areas to add more contrast. Use the color white.

These are the areas where I painted with white inside the layer mask.

4. How to Make Photos More Vibrant in Photoshop
Go to Layer > New Adjustment Layer > Vibrance. Increase the Vibrance to 100 and the Saturation to 4.
Click on the third button from the left to add this adjustment as a Clipping Mask for the layer below.

5. How to Use the Poster Edges Filter in Photoshop
Step 1
Press Control-J to make a copy of the Couple layer. Call this layer Comics Effect.
Go to Filters > Artistic > Poster Edges and make these settings.

Step 2
Add a Stroke layer style to the Comics Effect layer to create a black outline on the edges too.

Step 3
Create a new layer and call it Color. Right-click on the layer and choose Create Clipping Mask. Set the blend mode to Color Dodge.
Use the Brush Tool to paint over the blouse of the girl using the color #9a60c3. Do the same for the boy using the color #e06f00.

6. How to Use the Photocopy Filter in Photoshop
Step 1
Press Control-J to make a copy of the Couple layer. Move this layer above the Comics Effect layer. Call this layer Outline Effect. Set the blend mode to Multiply.
Set the Foreground Color to #000000 and the Background Color to #ffffff.
Go to Filters > Sketch > Photocopy and make these settings.

Step 2
Go to Filter > Stylize > Diffuse to create a softer effect. If there are too many lines, you can use the Eraser Tool to delete some of them.

7. Create a Halftone Texture in Photoshop
Step 1
Create a new layer called Halftone Texture and fill it with color #ffffff. Go to Filter > Noise > Add Noise.

Step 2
Go to Filter > Pixelate > Color Halftone and make these settings.

Step 3
Set the blend mode of the Halftone Texture layer to Multiply, opacity 66%.

Step 4
Add a Brightness/Contrast adjustment layer to lighten the image and make it brighter. If you want more vibrant and saturated colors, you can also add a Vibrance adjustment.

8. Create Speech Bubbles in Photoshop
Step 1
Use the Ellipse Tool to create some rounded shapes as shown in the preview image. Use the color #ffffff for the shapes.
To add the shapes on the same layer, make sure you check the Add to shape area button after making the first shape.

Step 2
There are all types of speech bubbles. For example, the one from the right is a thought bubble.
Let's make the other a speech bubble. Use the Pen Tool to add a triangle shape. Again, make sure you have the Add to shape area button selected.

Step 3
Add a Stroke layer style to the Bubbles layer using the color #000000.

Step 4
Add some text inside the speech bubbles using a comics font type. I will use the font BD Cartoon Shout.

Step 5
Use the Pen Tool again to draw a new shape. For the background color, use #ffeb27, and for the outline, use #000000.
Add some text using the colors #000000 and #dd1735.

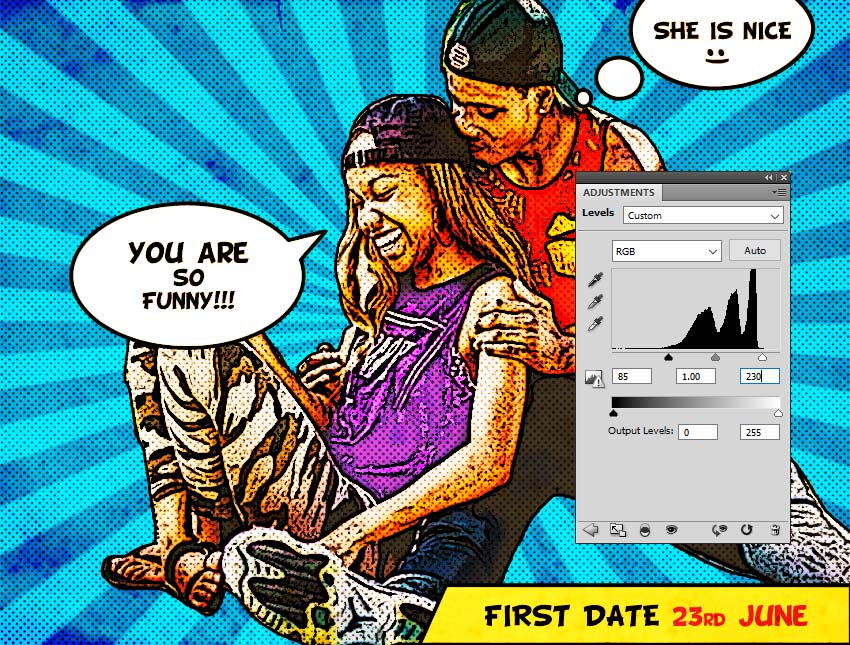
9. Create a Grungy Effect in Photoshop
To create a grungy effect, I will use the Old Paper Texture. Set the blend mode of this layer to Overlay.

Add a Levels adjustment just for this layer, using a Clipping Mask to adjust the effect to your liking.
10. Add a Border in Photoshop
Press Shift-Control-Alt-E to make a copy of all the layers. Add a Stroke layer style to create a border effect. Use the color #000000.

Congratulations! You're Done!
In this tutorial, you've learned how to create a comic book effect in Photoshop from scratch using filters and textures. I hope you've enjoyed this tutorial.

This comic book photo effect is a part of the Comics Book Photoshop Creator from my portfolio on Envato Market.
Looking for more comic book styles? Check out the following resources to learn more:
 ComicsHow to Make a Comic Book Cover
 Photo Manipulation50+ Insane Comic-Book Style Photoshop Effects and Cartoon Filters
 Text EffectsHow to Create a Cool 3D Comic Text Effect in Photoshop
 ComicsHow to Create Halftone Effects in Adobe Illustrator
 PhotographyHow to Add Retro Comic Book Effect Styles in Photoshop Fast

No comments:
Post a Comment