Do you want to learn how to create photo overlays in Adobe Photoshop? In this tutorial, I will show you how to add a texture overlay in Photoshop.
If you want to learn these techniques via video, check out our lesson on the Envato Tuts+ YouTube channel:
Tutorial Assets
You will need the following in order to complete this tutorial:
1. How to Prepare the Document
Step 1
Press Control-O and then select the image you want to use.

Step 2
Hit Alt-Control-I and resize the image to 3000 x 2000 px.

Step 3
After that, go to File > Place and put the overlay texture above the background layer.

Step 4
Create four duplicates of the texture and the background by pressing Control-J.

Step 5
Sequentially place each texture over each image layer.

2. How to Create a Photo Overlay
Step 1
Make all the layers except the first two Invisible, and then change the Blending Mode of the texture to Multiply.

Step 2
After that, press Alt-Shift-Control-B and then hit OK to convert the texture to black and white.

Step 3
Press Alt-Shift-Control-L to add auto-contrast to the texture.

Step 4
To make the image look brighter, let's go to Layer > New Adjustment Layer > Brightness/Contrast and choose the following settings:
- Brightness: 65
- Contrast: 20

This is how our image will look after all the manipulations listed above:

Step 5
Now, let's try another blending mode. Make a second pair of layers visible, and change the Blending Mode of the texture to Screen.

Step 6
Convert the image to black and white by pressing Alt-Shift-Control-B, as we did before.

Step 7
Hit Control-I to invert the texture, and then add auto-contrast by pressing Alt-Shift-Control-L.

Step 8
Let's create another style of photo overlay. Make the next pair of layers visible, and then select the texture layer and change the Blending Mode to Overlay.

Step 9
Convert the texture to black and white, and then add auto-contrast to the texture, as we did before.

Step 10
And for the last couple of layers, let's make the grunge texture overlay more obvious. Select the image layer, and then go to Layer > New Adjustment Layer > Hue/Saturation and create a new layer with Saturation of -25.

Step 11
After that, change the Blending Mode of the texture to Multiply and the Opacity to 85%.

Step 12
Add auto-contrast to the layer, and then go to Layer > New Adjustment Layer > Brightness/Contrast and choose the following settings:
- Brightness: 110
- Contrast: 20

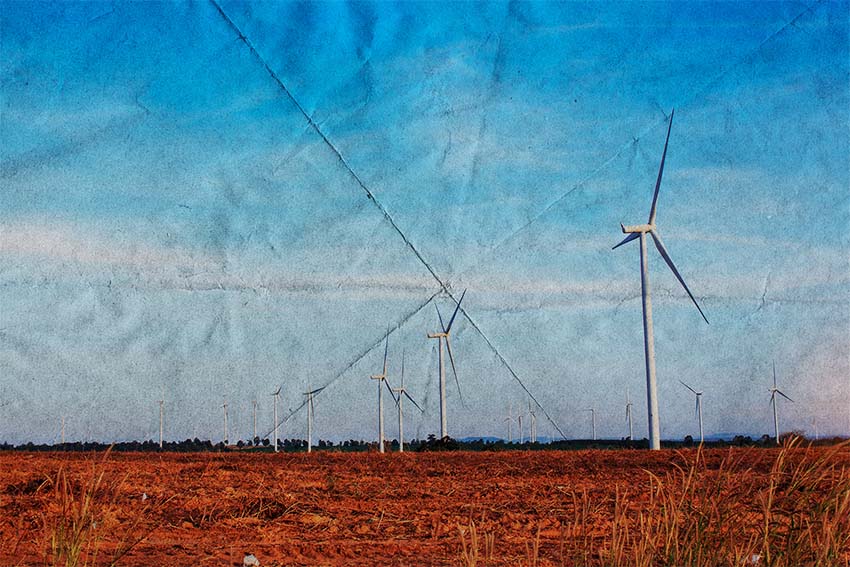
As you can see, in this case our texture works as a vintage photo overlay and gives our photo an old, grungy look:

Awesome Work, You're Now Done!
Here is our final result! Now you know how to create a photo overlay in Photoshop. Using this simple technique, we can add texture to any image in Adobe Photoshop and create cool photo overlays using blending modes and adjustment layers.

Looking for some more professional photo overlays? Check these products from GraphicRiver and Envato Elements:
10 Soft Grunge Gray Textures
Now that you know how to overlay photos in Photoshop, this pack of ten soft grunge textures could be a great tool for creating a vintage photo overlay. All of the textures come in 3000x2000 px, with 300 dpi high-quality resolution.

Vintage Nostalgia | Photo Overlay Textures
If you're looking for a paper texture overlay Photoshop pack, this collection of photo overlays is a great choice. It contains 18 complex paper textures with different vintage elements such as letters, notes, and illustrations.

30 Dust & Scratch Overlay Textures
Grunge texture overlay packs are an essential tool for creating vintage effects. This pack of 30 dust and scratches could be a handy tool for creating a faded or old look for your photos. Besides the textures, you will find a Photoshop action that helps you to work with the texture layers.

Textured Geometric Masks
If you're looking for something more creative and unusual, then check this pack of cool photo overlays with geometric and grunge elements. In this pack, you will find 15 high-quality transparent PNG files with A3 (297 x 420mm) size.

Paper & Card Mask Effects
This paper texture overlay Photoshop bundle contains 30 textures in one PSD template, so the process of selecting textures becomes easier than ever. The PSD file is 18 x 24 inches, with high resolution and RGB color mode.

Vintage Letterpress Texture Effects
If you want to add overlay textures not only to your photo, but also to your text and vectors, check this grunge texture overlay pack with ten smart PSD templates. It's very easy to use and has fully editable effects.

Want to learn more about how to overlay photos in Photoshop? Check these awesome tutorials:
 Photo EffectsHow to Make a Distressed Effect Photoshop Action
 GeometricHow to Create Textured, Geometric Objects in Adobe Photoshop
 Photo EffectsHow to Create a Sparkle Overlay Effect in Photoshop
 Photoshop ActionsHow to Create a Vintage Photo Effect Action in Photoshop

No comments:
Post a Comment