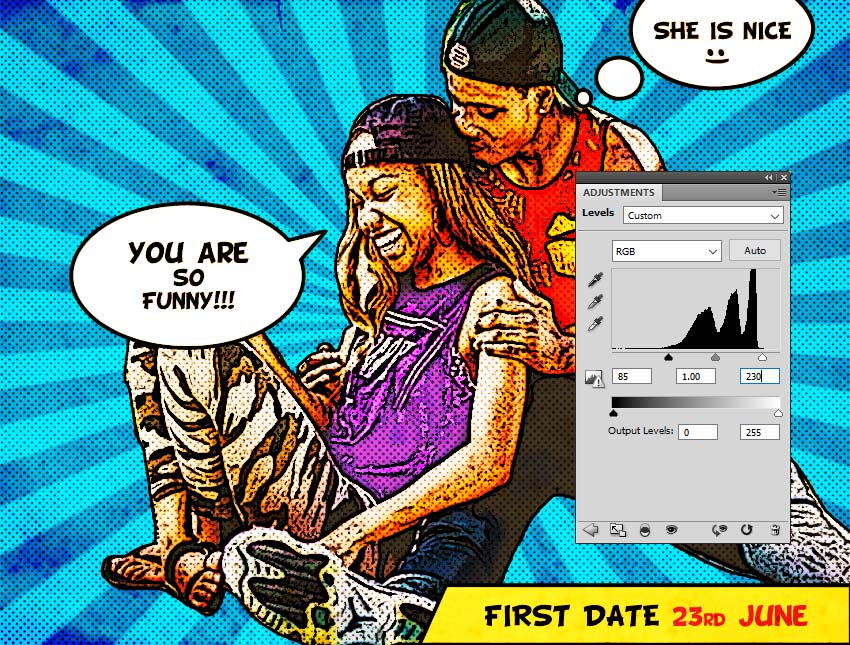
In this comic book Photoshop tutorial, I'll show you how to turn a photo into comic book art using filters and textures. A Photoshop comic book effect will give your photo a fun and realistic comic book look.
If you love the comic book style and you want to recreate it and apply it to your favorite photos, you're in the right place.

There are two ways to do it. One: follow this comic book Photoshop tutorial to learn how to do it from scratch. Or two: get an awesome comic book Photoshop action from Envato Elements to save yourself some time. You'll find our top picks at the end of this tutorial!
And if you'd like to see this comic book Photoshop tutorial in video format, check out our Envato Tuts+ YouTube channel:
What Will You Learn in This Adobe Photoshop Tutorial
- How to turn a photo into a comic with Photoshop
- How to make a comic book effect in Photoshop
- How to make a sunburst background
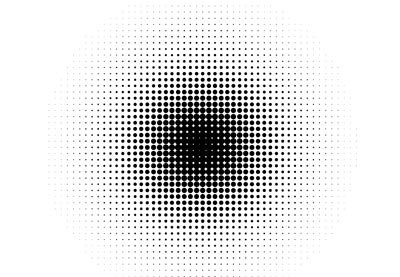
- How to create a halftone texture in Photoshop
- How to apply filters in Photoshop
Tutorial Assets
For this comic book Photoshop tutorial, you have to download these assets:
1. How to Create the Sunburst Background
Step 1
Let's begin creating our Photoshop comic book effect. Create a new 850 by 645 pixels document in Photoshop. You can, of course, choose any size you want, but you will have to adjust the settings proportionally.
Make a new layer called Sunburst Background. Pick the Gradient Tool (G) and choose the gradient colors: #777777 and #c5c5c5.

Step 2
Keep the Shift key pressed and draw a vertical line starting from the top of the canvas, with Linear gradient shades from the starting point to the ending point in a straight line.

Step 3
Go to Filter > Distort > Wave and make these settings to create vertical lines.

Step 4
Make sure you have the first line light gray and the last line dark gray. If this is not the case, press Control-T to fix that.

Step 5
It's very important to go to Image > Trim and make these settings, otherwise the previous step will not count.

Step 6
Go to Filter > Distort > Polar Coordinates to create the sunburst.

Step 7
Go to Layer > New Adjustment Layer > Gradient Map to add color to the sunburst background. You can choose any colors you want. I will use #003876 (location 23%) and #00b5e9 (location 100%).

2. How to Remove the Background in Photoshop
Step 1
On a new layer, add the Couple Photo and use the Lasso Tool to make a rough selection of the couple.

Step 2
Press Shift-Control-I to invert the selection. Press Delete to remove the background.

3. How to Increase the Contrast of a Photo in Photoshop
Step 1
Add a Brightness/Contrast adjustment layer to increase the contrast of this photo.
Click on the third button from the left to add this adjustment as a Clipping Mask for the layer below.

Step 2
Add a second Brightness/Contrast adjustment layer to increase the contrast of some parts of the photo.
Click on the third button from the left to add this adjustment as a Clipping Mask for the layer below.

Step 3
Click on the Layer Mask of the Brightness/Contrast adjustment layer and press Control-I to invert the white color.
Pick the Brush Tool and, with a soft round brush, paint over some areas to add more contrast. Use white color.

These are the areas where I painted with white inside the layer mask.

4. How to Make Photos More Vibrant in Photoshop
Go to Layer > New Adjustment Layer > Vibrance. Increase the Vibrance to 100 and the Saturation to 4.
Click on the third button from the left to add this adjustment as a Clipping Mask for the layer below.

5. How to Use the Poster Edges Filter in Photoshop
Step 1
Press Control-J to make a copy of the Couple layer. Call this layer Comics Effect.
Go to Filters > Artistic > Poster Edges and choose these settings.

Step 2
Add a Stroke layer style to the Comics Effect layer to create a black outline on the edges too.

Step 3
Create a new layer and call it Color. Right-click on the layer and choose Create Clipping Mask. Set the blend mode to Color Dodge.
Use the Brush Tool to paint over the blouse of the girl using the color #9a60c3. Do the same for the boy using the color #e06f00.

6. How to Use the Photocopy Filter in Photoshop
Step 1
Press Control-J to make a copy of the Couple layer. Move this layer above the Comics Effect layer. Call this layer Outline Effect. Set the blend mode to Multiply.
Set the Foreground Color to #000000 and the Background Color to #ffffff.
Go to Filters > Sketch > Photocopy and choose these settings.

Step 2
Go to Filter > Stylize > Diffuse to create a softer effect. If there are too many lines, you can use the Eraser Tool to delete some of them.

7. How to Create a Halftone Texture in Photoshop
Step 1
Create a new layer called Halftone Texture and fill it with color #ffffff. Go to Filter > Noise > Add Noise.

Step 2
Go to Filter > Pixelate > Color Halftone and make these settings.

Step 3
Set the blend mode of the Halftone Texture layer to Multiply, opacity 66%.

Step 4
Add a Brightness/Contrast adjustment layer to lighten the image and make it brighter. If you want more vibrant and saturated colors, you can also add a Vibrance adjustment.

8. How to Create Speech Bubbles in Photoshop
Step 1
Use the Ellipse Tool to create some rounded shapes as shown in the preview image. Use the color #ffffff for the shapes.
To add the shapes on the same layer, make sure you check the Add to shape area button after making the first shape.

Step 2
There are all types of speech bubbles. For example, the one from the right is a thought bubble.
Let's make the other a speech bubble. Use the Pen Tool to add a triangle shape. Again, make sure you have the Add to shape area button selected.

Step 3
Add a Stroke layer style to the Bubbles layer using the color #000000.

Step 4
Add some text inside the speech bubbles using a comic font type. I will use the font BD Cartoon Shout.

Step 5
Use the Pen Tool again to draw a new shape. For the background color, use #ffeb27, and for the outline, use #000000.
Add some text using the colors #000000 and #dd1735.

9. How to Create a Grungy Effect in Photoshop
To create a grungy effect, I will use the Old Paper Texture. Set the blend mode of this layer to Overlay.

Add a Levels adjustment just for this layer, using a Clipping Mask to adjust the effect to your liking.

10. How to Add a Border in Photoshop
Press Shift-Control-Alt-E to make a copy of all the layers. Add a Stroke layer style to create a border effect. Use the color #000000.

Your Photoshop Comic Book Effect Is Done!
You've learned how to make a comic book effect in Photoshop from scratch using filters and textures. I hope you've enjoyed this comic book Photoshop tutorial.

5 Top Comic Book Photoshop Actions From Envato Elements
You've seen how to make a comic book effect in Photoshop. Now, if you'd like to save time and still have all the fun, you need a comic book Photoshop action like the ones below.
These Photoshop comic book effects are available on Envato Elements. You can enjoy unlimited downloads with your subscription. If you're an avid Photoshop user, a graphic designer, or a digital artist, you'll love Envato Elements.
Now, let's check our favorite comic book Photoshop add-ons:
1. Retro Comic Book Photoshop Action Kit (ATN, PAT, PSD)

This Photoshop comic book effect is the best and most complete action kit you can get. You'll have realistic hand-drawn comic pages in just a few clicks. This comic book Photoshop kit includes:
- 15 vector speech bubbles
- 15 vector comic elements
- 12 vector comic sound effects
- five comic book frame templates
- two premium comic book mockup templates
- ten overall color presets
- unlimited options to customize
2. Comic Oil Paint Photoshop Actions (ATN)

This comic book filter for Photoshop is all about the painted look. The comic book Photoshop action will turn your pictures into realistic painted characters with its ten different comic book filters.
3. Comics Text Effects (PSD, ASL)

Who doesn't love comic book Photoshop titles? This comic book style Photoshop add-on is especially created for the text. This pack includes:
- ten different styles
- ten unique backgrounds
- smart objects
- well-organized layers
- 100% editable elements
4. Vectorial Photoshop Action (ABR, ATN, PAT)

One of the most distinctive characteristics of the comic book style is the background. This comic book Photoshop action helps you achieve the perfect one. The comic book Photoshop bundle comes with:
- five fully editable vector backgrounds
- ten color effects
- professional vector art effects
- organized layers and folders
5. Halftone Photoshop Actions (ATN)

The halftone effect is another characteristic of the comic book look. This comic book filter for Photoshop is the best and quickest way to get it. In a few clicks, you'll get four halftone variations and ten duotone variations.
Discover More Comic Book Photoshop Inspiration
Now you know how to make a comic book effect in Photoshop, and you've seen our top comic book style Photoshop actions. Looking for more comic book style Photoshop inspiration? Check out the following resources to learn more:
 ComicsHow to Make a Comic Book Cover
 Photo Manipulation50+ Insane Comic-Book Style Photoshop Effects and Cartoon Filters
 Text EffectsHow to Create a Cool 3D Comic Text Effect in Photoshop
 ComicsHow to Create Halftone Effects in Adobe Illustrator
 PhotographyHow to Add Retro Comic Book Effect Styles in Photoshop Fast
 CareersSo You Want to Be a Comic Artist?
 ComicsCreate a Comic: How to Plan and Lay Out Your Comic
 Adobe PhotoshopHow to Make a Halftone Pattern in Photoshop
 Drawing TheoryArt Therapy: How to Draw a Stick-Figure Comic
 Photoshop ActionsHow to Make a Retro Comic Book Portrait Effect Action in Photoshop
 Photoshop Actions30 Best Cartoon Photo Effects & Comic Text Photoshop Actions
 Photoshop Actions10 Cool Comic and Cartoon Effects for Photos with Photoshop Actions
No comments:
Post a Comment