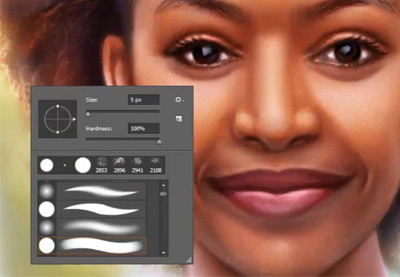
In this tutorial, we will create a snowflake Photoshop brush and make overlays for the image using a snow brush Photoshop preset.
If you want to learn these techniques via video, check out our lesson on the Envato Tuts+ YouTube channel:
If you want to learn how to create more similar photo effects or you need to find out how to install Photoshop brushes, check out these:
-

How to Add Realistic Falling Snow to a Photo in Photoshop
-

Create Animated Falling Snow in Photoshop
-

How to Install Brushes in Photoshop
Tutorial Assets
The following assets were used in the production of this tutorial:
1. How to Create a Snowflake Using Shape Layers
Step 1
Press Control-N to create a new document and use the following settings: 1000 x 1000 px; 300 dpi.

Step 2
Click U and select the Rounded Rectangle Tool. Create a shape with the following settings: Width: 30 px; Height: 720 px.

Step 3
After that, we need to create a duplicate of the shape using Right Click > Duplicate.

Step 4
Hit Control-T and change the Height to 20%.

Step 5
Rotate the shape by 45° while holding Shift.

Step 6
While holding Shift, move the layer 305 px up and 40 px to the right.

Step 7
Create a duplicate of the layer, and then go to Edit > Transform > Flip Horizontal.

Step 8
Move the duplicate of the shape 80 px to the left.

Step 9
Select the small shapes while holding Shift and then Right Click > Merge.

Step 10
Create two duplicates of this new layer, and move each new shape 70 px down.

Step 11
Merge all the shape layers and create a duplicate of your new layer. Then rotate it 180° while holding Shift.

Step 12
Merge the shapes again, and create two duplicates of the layer. Rotate these duplicates by 60° and -60°, and then merge these shapes into a snowflake.

2. How to Create a Snowflake Brush Using the Shape Layers
Step 1
Now we can start to create our brush. Make the background layer Invisible, and then go to Edit > Define Brush Preset, select any name you want to use, and hit the OK button.

Step 2
Now we need to change the brush's settings to create a complex brush texture. Select the Brush Instrument and hit the Brush Settings icon.

Step 3
Go to the Shape Dynamics panel and set the Size Jitter to 100% and Angle Jitter to 100%.

Step 4
Go to the Scattering panel, set the Scatter to 1000%, and put a tick on Both Axes. Our snowflake brush Photoshop settings are almost ready now—we just need to add some dynamics to the opacity of the snow brush Photoshop preset.

Step 5
Go to the Transfer panel and set the Opacity Jitter to 100%.

Step 6
Click on New Brush Preset to save the settings for the brush.

3. How to Create an Overlay Using a Custom Snowflake Photoshop Brush
Step 1
Open the image you want to use for overlaying, and then create two layers using Shift-Control-N.

Step 2
Select the brush, change the size to 250 px, and draw with this brush on the first empty layer to create an overlaying brush texture.

Step 3
Draw some more snowflakes on the second layer, and finally, to add some motion to the image, go to Filter > Blur > Motion Blur and use the following settings:
- Angle: 90°
- Distance: 25 px

Awesome Work, You're Now Done!
Congratulations! You have created snowflake brushes and snow overlays for an image using Photoshop shapes and brush instruments. Here is our final result:

Looking for some more snowflake or sparkle brush Photoshop items? Check these products from GraphicRiver:
Snowflake Brushes
In this set, you will find 12 greate snowflakes brushes, useful for creating overlays for your backgrounds and photos.

Christmas Snowflakes Brushes
This pack contains 60 hi-res snowflakes brushes with different brush textures. It could be extremely useful for creating Christmas and winter pictures.

Real Snow Photoshop Brushes
If you want something more realistic, check this 17 snow brush Photoshop pack. This item will work well for adding snow to your images. These brushes could be also useful if you need to create sparkle brush Photoshop presets, as it gives you realistic-looking particles.

30 Snow Decorations Brushes
This "30 snow decoration brushes" item contains a complex snowflake brush Photoshop pack with different complex shapes, great for creating elements of your Christmas background.

Realistic Snow Crystal Effect
This brushes pack contains six Photoshop snowflake brushes with crystal effect brush textures. A great choice for creating winter and Christmas decoration elements or backgrounds.

Want to learn snowflake brush Photoshop techniques, or maybe how to create illustrator vector snowflake shapes? Check these awesome tutorials:
 WinterHow to Draw a Snowflake
 WinterHow to Create a Set of Snowflake Icons in Adobe Illustrator
 Adobe PhotoshopPhotoshop in 60 Seconds: Create 4 Unique Custom Brushes
 WatercolorHow to Create Realistic Watercolor Photoshop Brushes From Scratch
No comments:
Post a Comment