
Do you like camouflage patterns? Would you like to create them on your own?
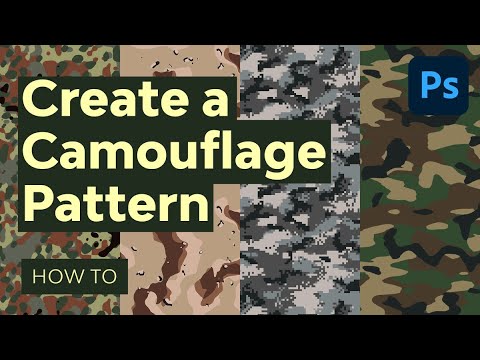
In this tutorial, I’ll show you how to design your own camouflage pattern. I’ll present four examples of military camo patterns: woodland, desert, urban digital, and flecktarn. We're going to create them from scratch, and then we're going to turn them into seamless patterns!
But if you want to save time, you can visit Envato Elements. The subscription gives you access to millions of creative digital assets, including this set of military camo patterns:

What You'll Learn in This Military Camouflage Tutorial
- How to paint camouflage patterns from scratch
- What are the most popular types of camouflage patterns
- How to make your army camouflage patterns seamless/tileable
Follow along with us over on our Envato Tuts+ YouTube channel:
1. How to Create a Woodland Camo Pattern
The woodland pattern is the most popular one—it's supposed to imitate the leaves, branches, shadows, and highlights of a forest. In this section, I'll show you how to paint camouflage patterns in the woodland style!
Step 1
We need to prepare the color swatches first. We're going to need the following colors:
- Green
#32482f - Brown
#483a2a - Sand
#8e7f5a - Black
#1d2323
Feel free to use different shades of these four colors to create the level of contrast you prefer.

Step 2
Create a New File with dimensions of 1500 x 1000 px. Take the Paint Bucket Tool (G) and fill the background with green.

Step 3
Create a New Layer, press D, and use the Paint Bucket Tool again. Right-click the layer and select Convert to Smart Object. Add a Layer Mask to this layer, fill the Layer mask with black, and click the chain link icon next to it.

Step 4
Press Control-T and in the upper bar change the dimensions to 90%.

Step 5
In the Properties panel, set the Feather to about 50%. Press Control-I to invert the colors. This layer mask will stop the splotches from being generated across the edge.


Step 6
Select the actual thumbnail of the layer now. Go to Filter > Render > Clouds. Go to the Adjustments panel and select Threshold. Adjust the level to create a couple of big splotches.


Step 7
Go back to the layer below, and go to Filter > Blur > Motion Blur. Adjust the Distance to achieve the level of detail you need.

Step 8
Select both layers and press Control-G to group them. Go to the Channels tab, hold the Control key, and click the thumbnail of the first layer.

Step 9
Go back to the Layers tab and hide the group. Select the background layer and create a New Layer. Fill it with brown, and then deselect with Control-D.


Step 10
Press Control-T, and then drag the sides of the image to the edges of the canvas without actually crossing them.

Step 11
Let's make this pattern seamless now! Go to Filter > Other > Offset. Select Wrap Around and play with the settings to achieve the effect you like. If there's a lot of space between some of the splotches, it's best to keep them near the center of the canvas.


Step 12
The other splotches need to be smaller, so go to Image > Image Size and change the Width to 3000 px.
Show the group again and change the settings to create smaller, more separated splotches. Double-click the Clouds effect to generate new splotches, adjust the Threshold to separate them, and change the distance of the Motion Blur to make the edges more detailed.
Repeat the previous steps to create the sand-colored splotches.


Step 13
When you're done, change the Image Size again, making it 4500 px wide and 1750 px high.
Take the Eraser tool (E) and remove some of the smallest splotches. Then go to Filter > Liquify to make the shape of the splotches more elongated and less regular.


Step 14
Repeat the previous steps to create the black-colored blotches.


Step 15
Let's test the pattern now. Go to Edit > Define Pattern and give the pattern a name. Create a New Layer and fill it with any color. Then double-click it and select Pattern Overlay. Select your new pattern and resize it.

Now, take a good look at the end result. Is there anything in your pattern that makes it look inconsistent? If so, hide the layer and fix the problem by moving certain splotches, erasing them, changing their shape, or copying them. Then turn it into a pattern again and test it on the layer above.

2. How to Create a Desert Camo Pattern
There are many types of desert camo—here we're going to take a closer look at six-color camo, also known as chocolate chip camo. Now let's see how to draw camouflage patterns in the desert style!
Step 1
For this pattern, we're going to need the following colors:
- Sand
#b89d80 - Beige
#d1b19c - Light beige
#d7bbad - Light brown
#885b44 - Dark brown
#543429 - Black
#1e201f

Step 2
Fill the background with the sand color. Start your pattern the same way as before, but this time use Gaussian Blur instead of Motion Blur—it will make the pattern less elongated. Also, add a black-filled layer to the bottom of the group to compensate for the brightness of the background.
Make these first splotches big and separated.

Step 3
Fill these new splotches with beige and stretch them almost to the edges of the canvas.

Step 4
Now, create the same set of splotches and fill them with light brown. Use the Lasso Tool (L) to drag the smaller brown blotches over the small beige ones, and use the Liquify filter to drag the bigger ones towards each other as well.

Step 5
Create another set the same way, this time filling them with dark brown. Use the Liquify filter again to make them narrower and less regular. Use the Eraser Tool (E) to remove the smallest splotches.

Step 6
Now merge these three layers with Control-E and use the Offset filter to make the pattern tileable.

Step 7
We have four colors in our pattern, so there are two colors left! To add them, first make the image 3000 px wide.
Create small, round splotches this time, and fill them with black. Stretch them to the edges of the canvas.


Step 8
Create an identical set of splotches and fill them with light beige. This time, don't resize them, but instead use the Lasso Tool (L) to place each beige splotch over the black one.

Step 9
When you're done, merge these two layers. Then duplicate the merged layer by pressing Control-J a couple of times, make the copies smaller, and rotate them to fill the empty spaces in the pattern.

Step 10
Use the Offset filter to make all these layers tileable. Test the pattern the same way as before and make some corrections if necessary.

3. How to Create an Urban Digital Camo Pattern
Digital camo is a type of camo pattern that's produced by a computer—hence the pixelated look. Pixelated camo can come in all colors, but here we're going to take a look at the urban type. Urban camouflage patterns usually use various shades of grey. If you want to learn how to draw camouflage patterns in the pixelated style, keep on reading!
Step 1
For this kind of pattern, we're going to need the following colors:
- Dark grey
#4c4c4c - Bluish grey
#7c8486 - Light grey
#bfb6b1 - Black
#1d2323

Step 2
Create this pattern the same way as you would the woodland pattern, but this time use these four colors.

Step 3
Copy the whole image by pressing Control-Shift-C, and then paste it to a new file. Make the image 150 pixels wide, using the Nearest Neighbor as the Resample method.

Step 4
Zoom in until you can see the individual pixels of the pattern. If you can see a white grid, go to View > Show > Pixel Grid to hide it. Now, take the Pencil Tool (B) and go to the Brush Settings. Add some Scattering and make sure the brush size is set to 1 px.

Step 5
Use this pencil to draw dark grey over the edges of the black splotches to make them narrower and more pixelated.

Step 6
Now pixelate the border between the dark grey and the bluish grey splotches.

Step 7
Switch to light grey and make the grey splotches more detailed. Feel free to make the brush a little bigger in some places for more variety.

Step 8
Look at the whole pattern and add any adjustments you need.

Step 9
When you're done, resize the image back to 4000 px, keeping the same Resample method. You can now turn the image into a new pattern!

4. How to Create a Flecktarn Camo Pattern
Flecktarn is a pattern based on speckles grouped in clusters. It was designed first by the German army, but different variants of it have been popularized all around the world.
Step 1
Typically, flecktarn consists of these five colors:
- Pale yellow
#9b9b6b - Light green
#5e6254 - Red
#76422f - Dark green
#354132 - Black
#130a06
Create a new file, 2000 px wide and high.

Step 2
Fill the background with pale yellow. Create a New Layer. Fill it with black, and then duplicate it with Control-J and go to Filter > Noise > Add Noise.

Step 3
Press Control-T and resize the image to 4000%.

Step 4
Put the noise layer into a group. Add a Layer Mask to the group the same way as before, creating a feathered edge around the border.

Step 5
Add the Threshold adjustment layer and adjust it to create a lot of irregular splotches.

Step 6
Create a New Layer over the noise layer. Take the Brush Tool (B), set the Flow to around 10%, and use the Soft Round Brush to make the pattern less consistent. Paint with white to create clusters, and with black to create spaces between them.


Step 7
When you're done, use the same method as previously to turn this black-and-white pattern into light green splotches. Stretch this new pattern to the edges of the canvas.

Step 8
Go back to the group and remove the content of the layer above the noise layer (press Control-A, then Delete). Paint on it again, creating a slightly different pattern this time. Turn it into red splotches and stretch it.


Step 9
Use the Offset filter on both layers to make them complement each other.

Step 10
Repeat this step, this time trying to turn the elongated splotches into smaller, rounder ones. Remove the smallest ones as well. Color the final result with dark green.


Step 11
Stretch the layer, and then duplicate it and move the copy slightly up and to the right. Merge both copies by pressing Control-E, and then use the Offset filter on them.


Step 12
Repeat the same step again, this time trying to create one or two big clusters. Color them with black.
Finally, turn the whole image into a new pattern, test it, and fix it if necessary.

Great Job, Soldier!
And that would be all! Now you know how to design your own camouflage pattern. You can add these patterns to any type of apparel, for example using the mockup generator at Placeit.

Army Camo Patterns
If you want to save time, you can use these camo patterns created by professionals on Envato Elements:
Military Camouflage Patterns Set (AI, EPS, JPG)
This set contains 38 army camo patterns, based on real army camouflage patterns! They come both in the vector format and in a ready-to-use raster one. Whether you need some urban camouflage patterns, woodland ones, or desert ones, you're likely to find something for yourself in this set!
Army Camo Patterns Backgrounds (JPG, PNG)

This army camouflage pattern comes in ten color versions. The pattern itself is based on real military camouflage patterns, but with different color variations you can make it more fun and useful for a variety of projects.
Pixelated Military Camo Patterns (AI, EPS, JPG, PNG)

This set contains five types of camouflage patterns, all in the digital style. They're vector, so they're perfectly scalable to any size you wish!
Classic Camouflage Patterns (AI, EPS, JPG, PNG)

If you liked the colors from the previous sets, but you're into a more traditional style of military camo patterns, this set is for you—it includes patterns in the same colors, but they're not digital this time.
Gold Army Camo Patterns (AI, EPS, JPG)

Military patterns look cool on their own, but they may look even cooler if you apply some creativity to them. This set contains six camo patterns and six gold texture patterns that you can apply to your camouflage to make it look unique.
Military Fonts
If you want to use a camo pattern as a background for something, make sure you also use the right font! Here are a couple of military fonts available on Envato Elements, and you can also find a bigger collection here:

Military Serif Font

This font is inspired by classic military stencil design. It's solid, clean, and easily readable, and it will work perfectly for any military-styled projects.
Stencil Slab Serif Font

This font is stencil-inspired too, but it's even simpler and more straightforward—its military style is visible at first glance, so it will look great in a headline on a poster or flyer.
Army Kids Font

This font is less serious, perfect for military-styled projects directed at a younger audience, or anything only roughly related to the army and war. Despite its fun look, it's still clearly a military font!
Military Technology Font

Do you want something more futuristic? This font is inspired by the technology of the future! It will be perfect for science-fiction projects—everything including robots, war in space, or simply any high-technology military topics.
Military Sans Font

If you want something classic, clean, and straight to the point, this military font will do its job perfectly! It's bold, full of hard edges, and it comes in two versions: a stencil version and a normal one.
More Photoshop Pattern Tutorials
 PatternsQuick Tip: How to Create a Denim Pattern in Adobe Photoshop
 TexturesHow to Make a Leather Texture in Photoshop
 TexturesHow to Create a Wood Grain Texture in Photoshop
 GeometricPhotoshop in 60 Seconds: How to Create a Simple Geometric Pattern
 PatternsHow to Create a 90s Geometric Pattern Using Basic Shapes in Adobe Photoshop

No comments:
Post a Comment